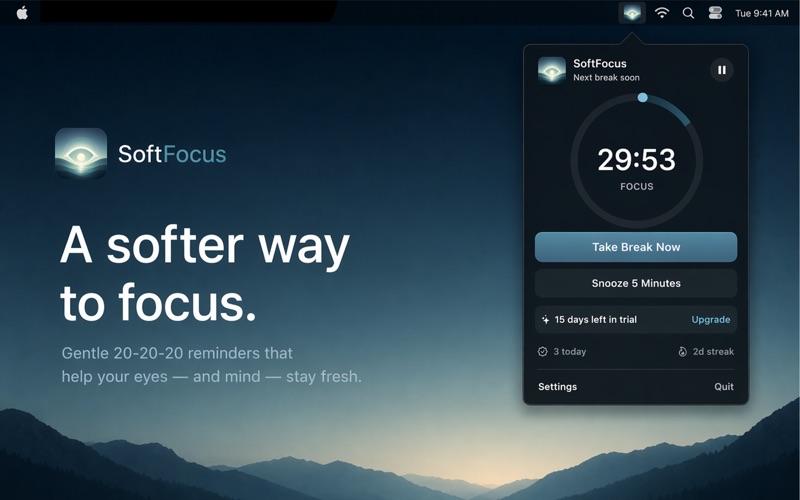
To set up Blink on your Mac, open the app, keep reminders enabled, and use the standard 20-minute work interval with a 20-second break. Then choose whether the app should open at login, pause during calls, or use a different visual style. This guide walks through the controls and explains what to check if a reminder does not appear.
You need macOS 14 Sonoma or later. Get Blink on the Mac App Store. The app includes a 15-day Pro trial; features marked Pro below require the trial or the one-time upgrade. Basic 20-20-20 reminders continue after the trial.
1. Open General settings and check the timer#
Open Blink, complete the welcome screens, and click the eye icon in the menu bar. Choose Settings, then General.
Start with these controls:
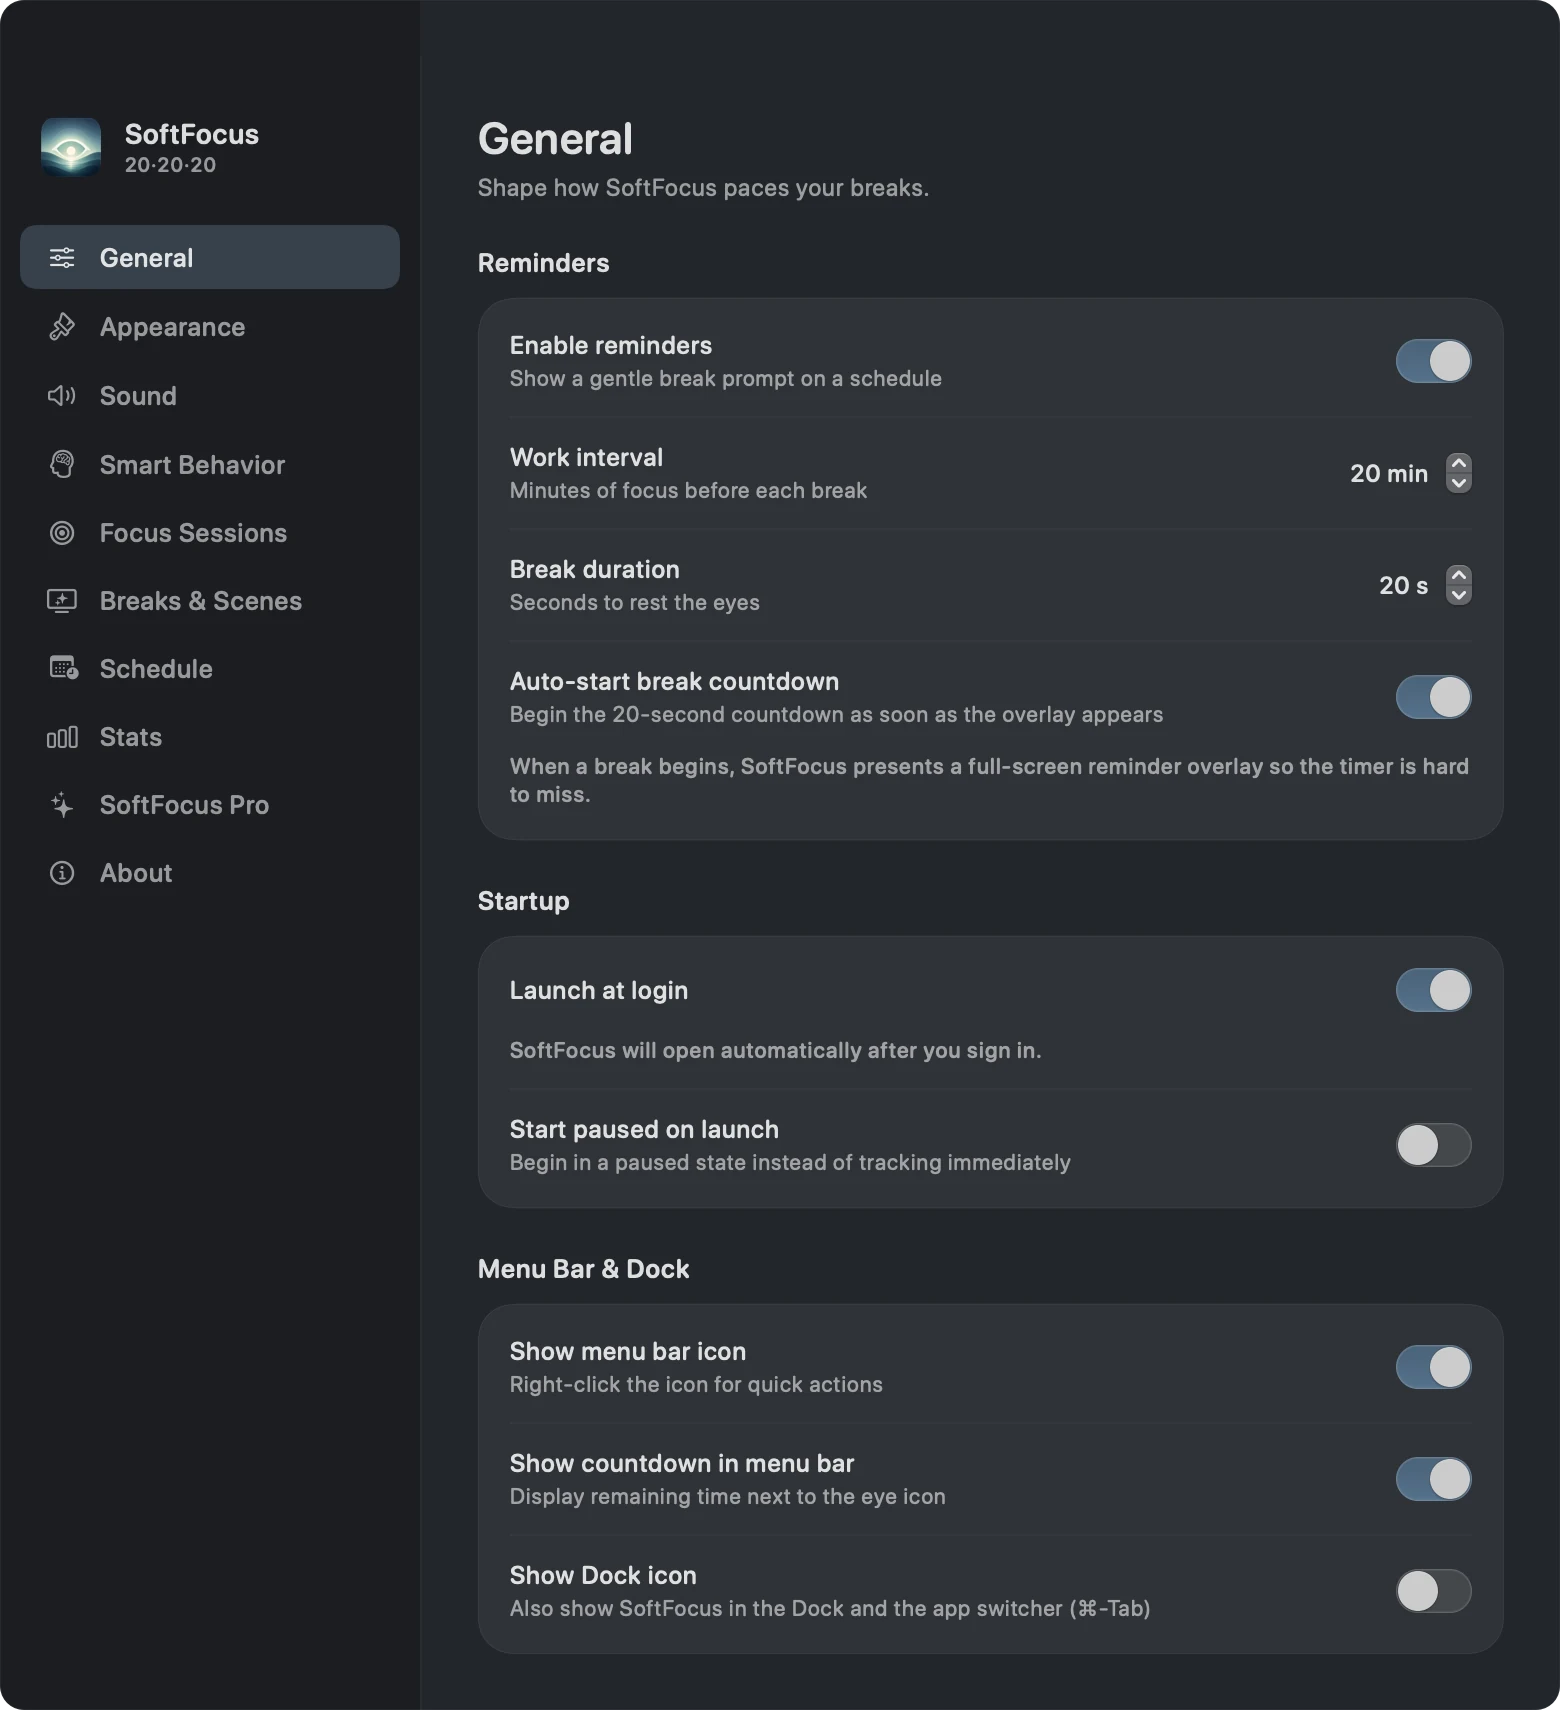
| Setting | A straightforward starting point |
|---|---|
| Enable reminders | On |
| Work interval | 20 minutes |
| Break duration | 20 seconds |
| Auto-start break countdown | On, so the countdown begins when the prompt appears |
| Start paused on launch | Off, so the timer can start when the app opens |
The cover screenshot shows these controls in the installed Mac app. The default timing follows the 20-20-20 rule: pause every 20 minutes and look roughly 20 feet away for at least 20 seconds.
Pro: You can change the work interval from 1 to 90 minutes and the break duration from 5 to 120 seconds, in five-second steps. If you change the work interval, the timer starts a fresh cycle. A custom rhythm is useful when you intentionally want different timing, but it is no longer the standard 20-20-20 schedule.
2. Choose startup and menu bar behavior#
In General → Startup, enable Launch at login if you want Blink to open when you sign in. If macOS requires approval, Blink provides an Open Login Items Settings button to take you to the relevant system setting.
Under Menu Bar & Dock, you can:
- Keep Show menu bar icon enabled for access to the timer and settings.
- Turn on Show countdown in menu bar to see the remaining time beside the eye icon.
- Enable Show Dock icon if you also want Blink in the Dock and app switcher.
If you hide both icons, the app can continue running in the background. Open Blink again from Applications or Spotlight to return to Settings.
3. Try a break before relying on the schedule#
Open the menu bar panel and select Take Break Now. Blink displays the full-screen prompt. With automatic countdown enabled, the break begins immediately; otherwise, use the prompt's start control.
Look away from your Mac while the countdown runs. If you have multiple displays, Blink places the interactive card on the display under your pointer and matching break backdrops on the others. After a completed break, the next work interval begins.
You can pause or snooze from the menu bar when necessary. Pro's optional Strict mode removes the break prompt's usual skip and snooze choices, so leave it off while learning the basic flow.
4. Configure idle and meeting pauses#
Open Settings → Smart Behavior. The basic presence controls are:
- Pause when idle: stops the timer when you have been away from input for the chosen threshold. The default threshold is two minutes.
- Reset after sleep or lock: starts a fresh work cycle when you return.
Pro: Enable Pause during meetings if you want Blink to pause while a microphone is in use. It checks microphone activity without accessing audio. This may also pause the timer during recording or dictation, and a call without an active microphone may not trigger it.
Pro: Enable Pause in full-screen apps if you want the timer paused while working in a full-screen window. Leave it off if full-screen work is exactly when you want reminders.
Pro: Adaptive snooze delay lengthens postponements when you repeatedly snooze. Leave it off if you prefer the ordinary five-minute snooze behavior.
5. Choose appearance, scenes, and sounds#
In Appearance, select System, Light, or Dark, enable Compact mode for a smaller menu panel, or use Reduce animations. Pro unlocks additional accent colors.
In Breaks & Scenes, Pro offers Ocean, Aurora, Rain, Forest, Fog, and Sunset backgrounds. You can also choose a guided break such as 20-20-20 or Blink rest, rotate guides with Surprise me, or leave guidance Off for the plain countdown.
If you are following the 20-20-20 rule, use the prompt to remind you to look into the distance. You do not need to watch an animation throughout the break.
In Sound, Pro lets you select a sound style, adjust volume, and control start and completion cues. A completion cue can tell you when the break is over while you are looking away.
6. Add focus sessions or schedules if useful#
Pro Focus Sessions combine work-and-break blocks into a session. Enable the feature, choose 2 to 10 blocks, and start a session. The menu panel shows your progress toward the goal. Each block includes a work interval and its completed break.
Pro Schedule Profiles switch your break rhythm by time of day and weekday. Open Schedule, review the available profiles and their times, and enable the feature if those routines suit you. Profiles can change timing, accent, scene, and whether reminders are enabled. If you are still testing basic timing, leave schedules off until that routine is predictable.
These features are optional. A repeating 20-minute timer works without creating a focus session or enabling a schedule.
7. Review your break history#
Open Stats to see today's completed breaks, your current and best streaks, your all-time count, and the last seven days. The Trophy Shelf shows milestones, with Pro adding milestone celebrations.
Use the history to understand your reminder habit. It records completed breaks in the app; it cannot verify that you looked away or measure improvements in your eyes. Break history stays on this Mac. See the privacy policy for details about local data and purchase verification.
Troubleshooting: why is Blink not reminding me?#
Check these settings before reinstalling the app:
| What you notice | What to check |
|---|---|
| The timer stays paused after opening | Turn off Start paused on launch if unwanted, then resume from the menu panel. |
| No automatic breaks appear | Check Enable reminders, and confirm the timer is running. |
| The timer pauses while you are at your desk | Check the idle threshold, microphone activity, and the meeting/full-screen pause options. |
| Timing changes at a particular hour | Review whether Schedule Profiles is enabled and which profile is active. |
| The prompt appears but the break countdown waits | Check Auto-start break countdown, or start the break manually. |
| Custom timing, scenes, or sounds are unavailable | Check Pro status. When the trial expires without an upgrade, the app returns to the basic 20-minute/20-second routine. |
| Blink is running but the icon is missing | Open it from Spotlight or Applications and enable Show menu bar icon in General. |
| Launch at login needs approval | Use Open Login Items Settings in General and review the macOS setting. |
If you already bought Pro but it is not showing, use the restore-purchases option in the Pro screen. For an unresolved issue, contact Vexil support with your macOS version, Blink version, and the behavior you expected.
For help deciding which features you need, read our Mac eye-break reminder guide. For the app overview and download link, visit Blink for Mac.